
What Can You Make From a JPG Image?
A JPG is a flat image. It contains colors and brightness but does not tell a 3D printer the true depth, hidden sides or back of the object in the photo. This converter turns the light and dark parts of the image into raised areas or a panel with changing thickness.
You can make a raised mountain scene, decorative photo plaque, text artwork or backlit portrait panel. But one JPG cannot show the hidden sides of a person or object, so this tool cannot create an accurate model you can view from every angle.
If you already have a model file rather than a photo, use an STL viewer to inspect it instead of turning it into an image first.
JPG to STL: Should You Choose Relief or Lithophane?
| Feature | Raised relief | Lithophane |
|---|---|---|
| What the JPG controls | How high or low the surface sits above a base. | How thick each area of a photo panel becomes. |
| How you see the picture | Look at its raised surface from the front. | Place a light behind the panel. |
| Good starting image | Landscapes, illustrations, signs. | Portraits and high-contrast photographs. |
| Typical shape | Flat plaque with a solid base. | Flat or curved panel. |
| Can you see the object from every side? | No. | No. |
Not sure which to try? Start with Relief if you want to feel the raised details, or Flat Lithophane if the image should appear when backlit.
Which method should you use?
| You want to make | Choose | Why |
|---|---|---|
| A raised landscape, sign or wall plaque | JPG to STL: Relief | Brightness becomes a raised surface that is visible without backlighting. |
| A glowing portrait or photo gift | JPG to STL: Lithophane | Varying thickness reveals the grayscale image with light behind it. |
| A logo with transparent edges | PNG to STL | PNG can keep a transparent background that JPG does not support. |
| A complete figure seen from all sides | 3D modeling or 3D scanning | One photo does not show the hidden sides or back of an object. |
Method 1: Convert a Landscape JPG to a Raised STL Relief
We'll use the mountain landscape photo from the converter. Its changing light and shadow make it useful for seeing how a JPG becomes raised surface detail.
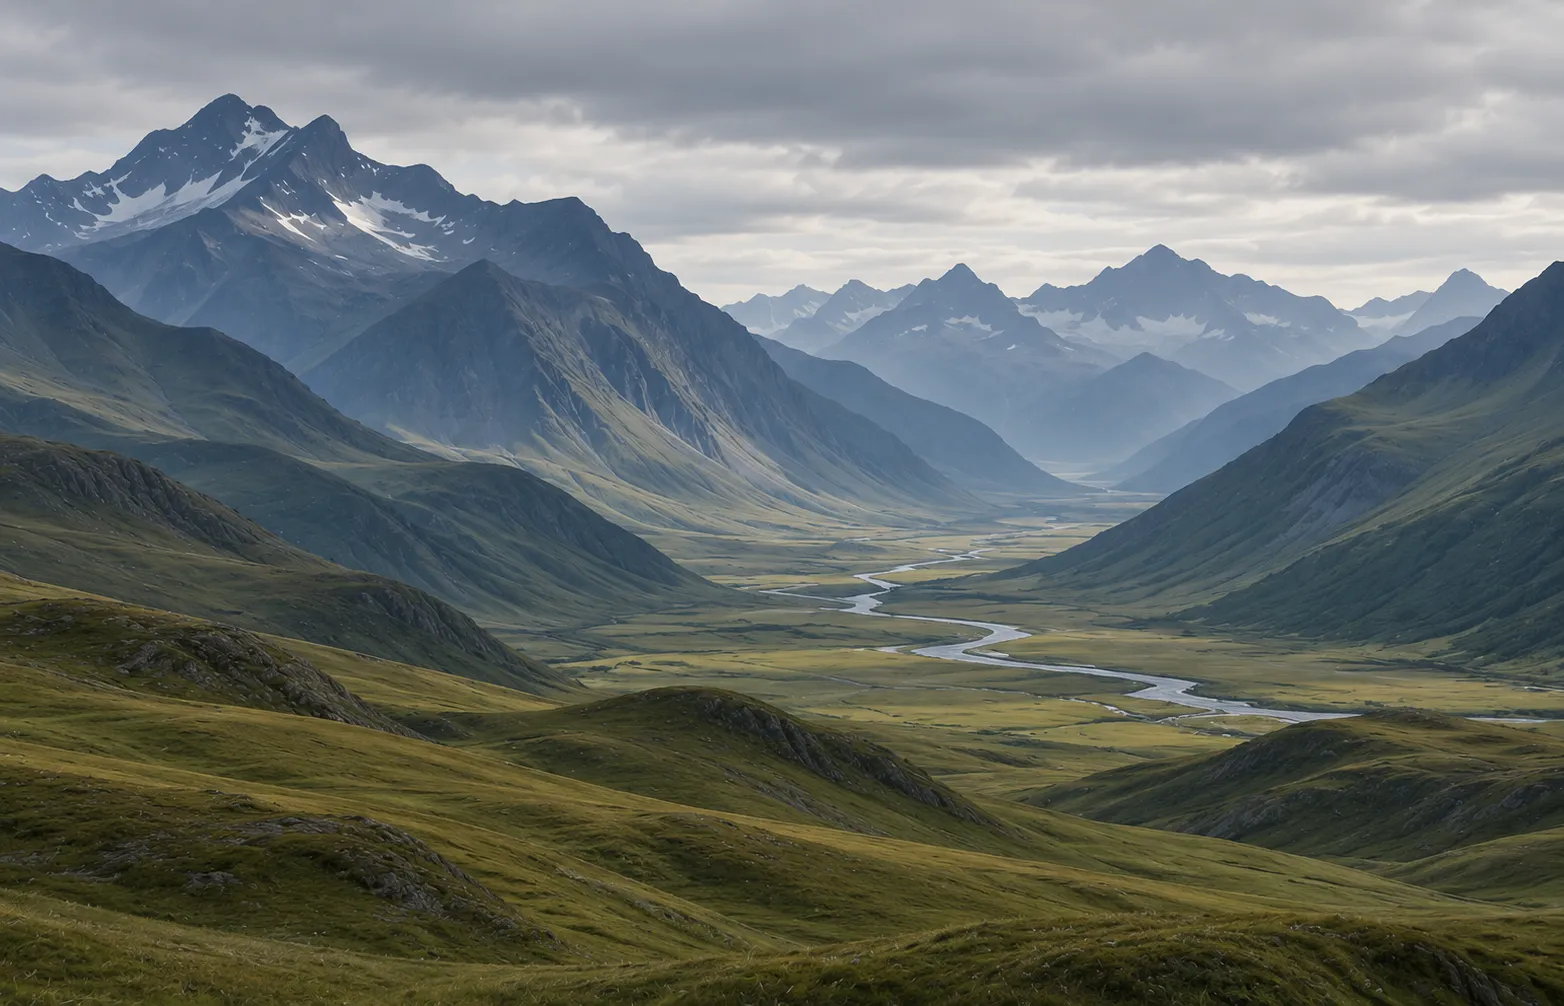
Download this JPG or try it directly in the converter. You can adjust the suggested settings after loading the photo.
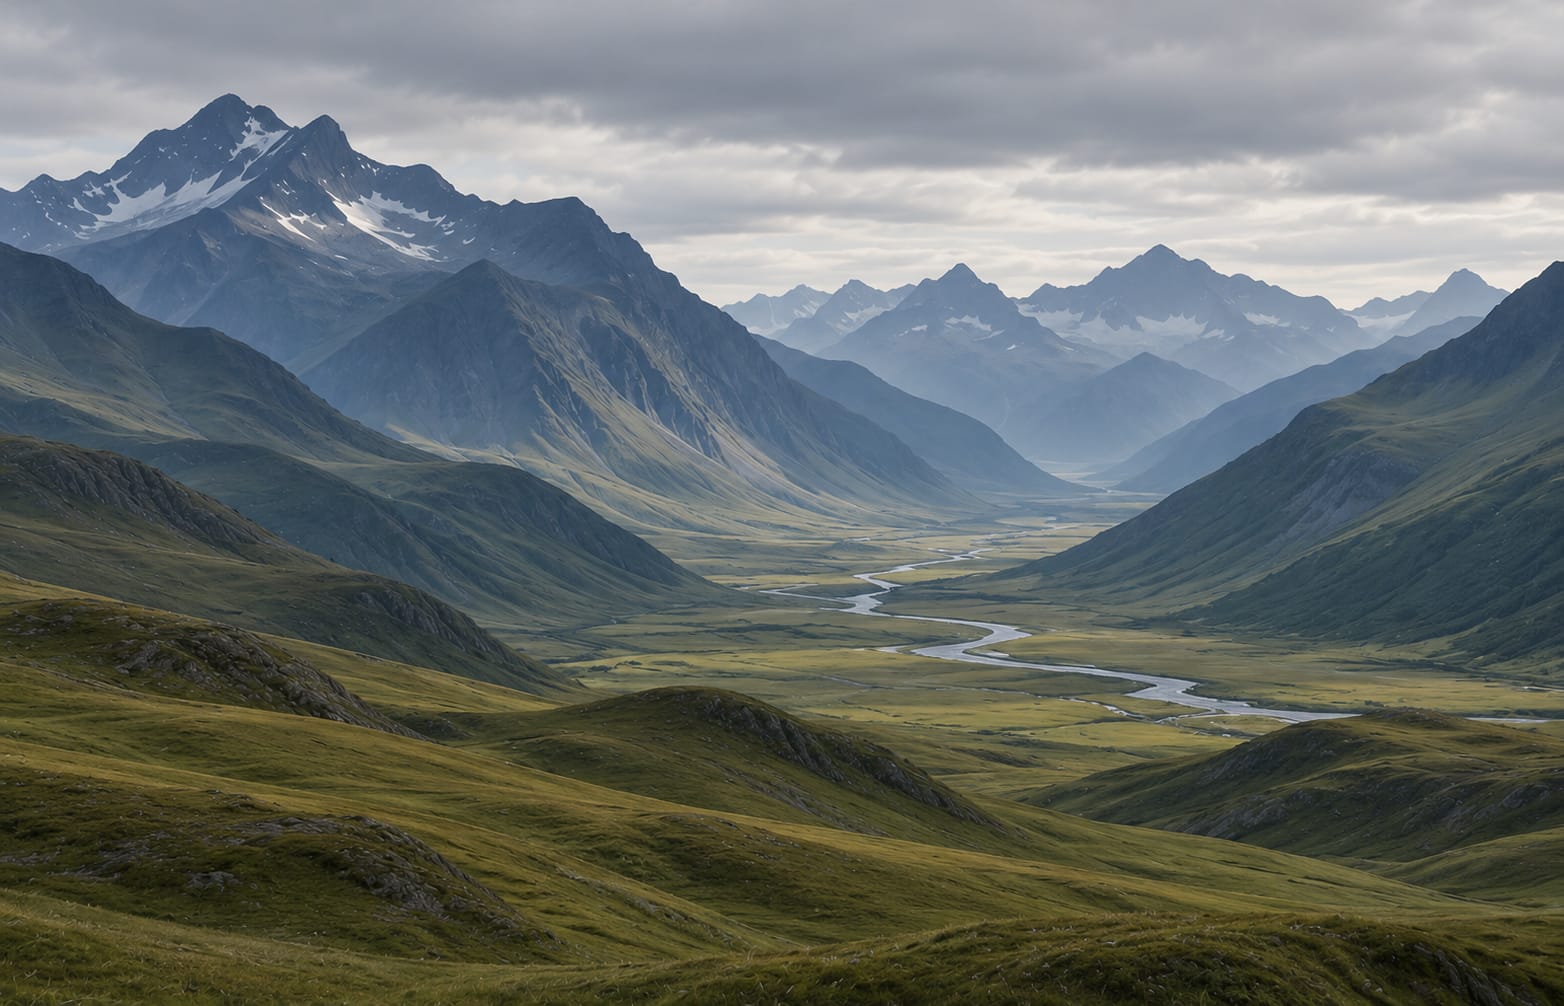
On the JPG to STL page, choose Try this example under Landscape JPG to Raised Relief to open the photo with suggested settings.
- Load the image. Open the JPG to STL converter, choose your own JPG, or use Try this example in the landscape sample card.
- Select Photo Relief. Choose the Relief mode with a flat shape. A raised photo is better for looking at from the front than for backlighting.
- Set the base and height. For this sample, start with Base 2 mm and Relief 4 mm; the total height varies across the photo.
- Adjust photo detail. Set Contrast +15, Smoothing 2 and Medium (192) detail. Leave Invert off for this photo.
- Inspect the three views. Compare the original photo with the black-and-white preview, then rotate the 3D model. If the sky looks too bumpy, crop the image or adjust smoothing.
- Download STL. Select Download STL; the recommended Compact STL format is suitable for most slicers. Then open it in your slicer to check its real dimensions and layers.
These are suggested starting settings for this landscape. Other photos and printers may need adjustments.
Method 2: Convert a Portrait JPG to a Flat Lithophane STL
A lithophane uses thickness rather than raised front-facing detail to show the image. Thinner areas let more light through and thicker areas block more light. You need to view the final print with a suitable light source behind it.
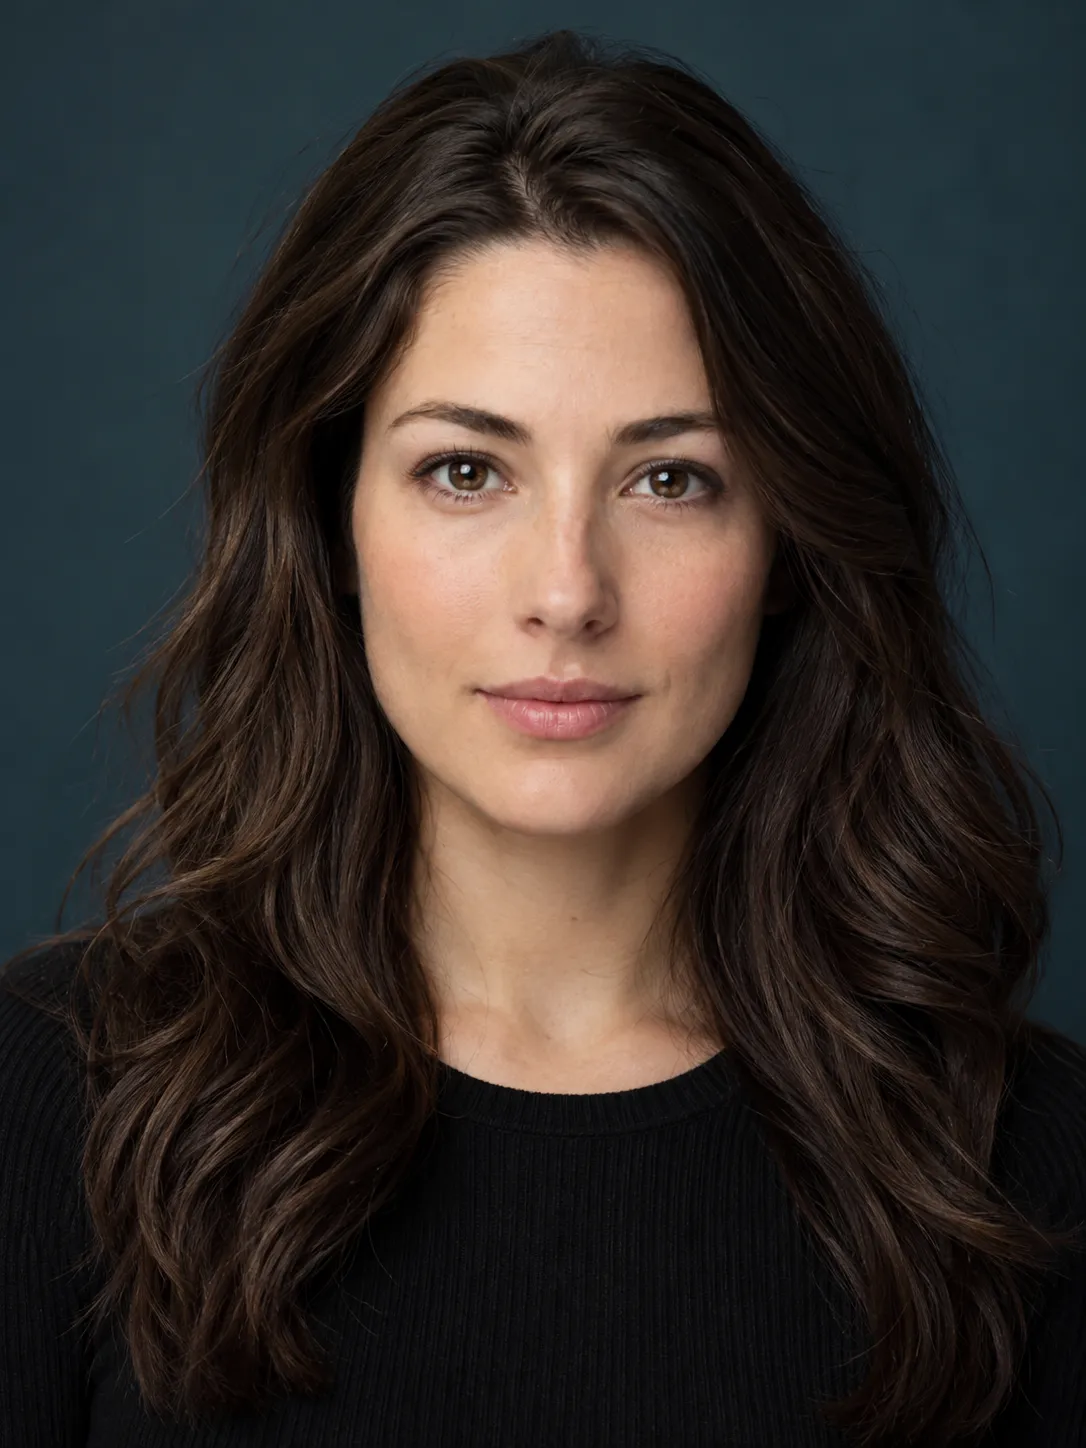
Download this portrait or open it in the converter to see how changes in thickness form the photo.
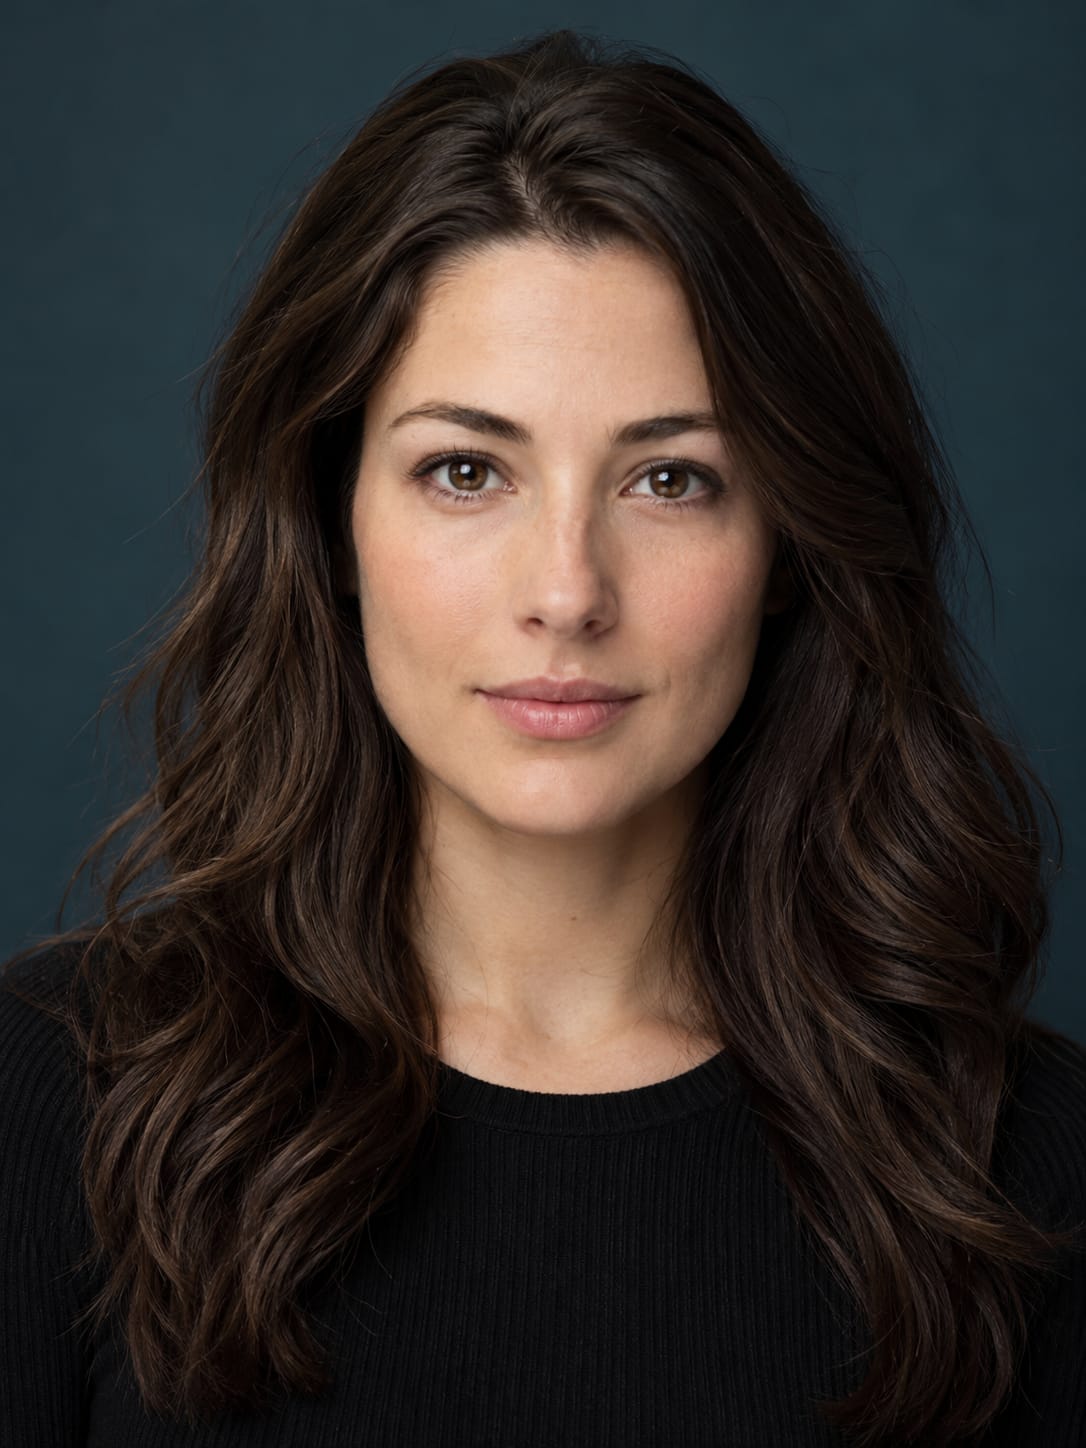
On the converter page, choose Try this example in Portrait JPG to Flat Lithophane.
- Load the portrait. Choose the sample in the JPG to STL tool or select a clear portrait from your device.
- Select Flat Lithophane. Choose Lithophane mode and set the shape to Flat. Keep the original crop unless you want to frame the photo differently.
- Set panel thickness. Start with Minimum thickness 0.8 mm and Maximum thickness 3.2 mm. This is a 2.4 mm variation, not 3.2 mm added on top of 0.8 mm.
- Adjust the image. Use Contrast +20, Smoothing 1, Invert on and Medium (192) detail to match the sample.
- Check the preview. Compare the portrait with the black-and-white preview, then rotate the model to see its thicker and thinner areas. The final print will look different depending on the material and light.
- Download and slice. Download your STL, import it into a slicer, check thin areas and print direction, and try a small test before making a full-size panel.
Lithophane contrast depends on filament opacity, print direction, light source and panel thickness. Printed results may look different from the preview.
Recommended Starting Settings for JPG to STL
| Setting | Landscape relief | Portrait lithophane |
|---|---|---|
| Mode | Photo Relief · Flat | Lithophane · Flat |
| Base / minimum thickness | 2 mm | 0.8 mm |
| Relief / maximum thickness | 4 mm raised relief | 3.2 mm total maximum |
| Contrast | +15 | +20 |
| Smoothing | 2 | 1 |
| Detail | Medium (192) | Medium (192) |
| Invert | Off | On |
| Check most carefully | Raised noise in background | Thickness and backlit contrast |
You can also adjust the crop, size, brightness and level of detail. Start with Medium to keep the preview manageable; increase detail only when the shape benefits. Higher detail cannot make a blurry JPG sharp.
Which setting should you change first?
For unwanted bumps: crop away the background first, then try a little more Smoothing. For a weak relief: check the black-and-white preview before increasing Contrast or Relief. For a dark or washed-out lithophane: first check Invert, then test the thickness range and actual backlight. For missing fine detail: use a sharper source photograph before increasing Detail. Change one setting at a time so you can see what improved.
Base and relief height are different controls. The landscape example starts with a 2 mm base and can add up to 4 mm of raised detail. That means the tallest parts can reach 6 mm in total, although your photo may produce a lower result. The portrait lithophane uses a total panel thickness range of 0.8 mm to 3.2 mm, not a 3.2 mm addition to its base.
How to Choose the Right JPG-to-STL Size and Detail
Choose the size of the finished print before increasing Detail. Even a sharp photo cannot create features smaller than your printer can reproduce. Adding more 3D detail also will not fix blur, blocky areas or unwanted shadows in the original image.
Keep the image proportions unless you mean to stretch it
The converter lets you set the width and height while keeping the photo's original proportions. As a simple example, a 4:3 JPG set to 120 mm wide would be 90 mm high when its proportions are preserved. Cropping removes part of the photo, while stretching can make faces, letters and landscapes look distorted. Verify the actual model dimensions shown in the converter and slicer rather than relying on image pixel dimensions.
Why Medium detail is a sensible first pass
Use Medium (192) to check the overall form quickly. If the source has meaningful edges that look stepped in the 3D preview, compare a higher Detail setting with the same crop and dimensions. More detail can make the STL larger, but it cannot restore a blurry photo or create features that are too small for your printer.
| What you notice | Try first | Keep in mind |
|---|---|---|
| Blocky areas in the model | Use a clearer photo or a little Smoothing. | Increasing Detail cannot fix a blurry or heavily compressed photo. |
| Fine edges look jagged in 3D | Increase Detail and compare the preview. | Some very small features may still disappear when printed. |
| Fine details vanish in the slicer | Make the model larger or simplify the design. | More Detail cannot make your printer produce thinner lines. |
| The portrait looks stretched | Check the crop and keep the original proportions. | Contrast and Smoothing will not fix stretched faces. |
For a tall lithophane, also check that its narrow bottom edge is adequately supported in the chosen print orientation. Scale with care: scaling a lithophane uniformly changes panel thickness as well as width and height, which can change how much light passes through it.
How Does JPG-to-STL Conversion Work?
The converter first turns your JPG into a black-and-white image called a height map. Light and dark areas then control the raised surface in Relief mode or the panel thickness in Lithophane mode. Finally, the result is saved as an STL file you can open in a 3D-printing slicer.
An STL describes a 3D shape using many small triangles. It does not keep your photo's original colors, and it does not say whether the size is in inches or millimeters. This converter uses millimeters, so check the size when you open the file in your slicer.
Where can you preview the photo and 3D model?
Visit the JPG examples to see each photo beside its black-and-white preview. Select Try this example to open it in the converter and rotate the 3D result. You can follow the same steps with your own photo.
How to Prepare Your JPG Before Converting to STL
The original photo matters as much as the converter settings. If the black-and-white preview shows unwanted details, try improving the photo before increasing Detail.
- Choose a sharp original. A tiny or heavily compressed JPEG tends to create jagged or blocky surface detail.
- Crop closely. Remove unnecessary sky, furniture or empty space that would otherwise become raised texture or panel thickness.
- Use even lighting. Strong shadows and bright spots can appear as raised or lowered areas, even when the photographed object is actually flat.
- Keep the important shades of gray. Adjust contrast carefully. Too little can make a flat-looking relief; too much can erase facial or landscape detail.
- Check the black-and-white preview. Increase Smoothing a little for JPEG blocks or grain, but do not blur away details you want to print.
What if the photo has a messy background?
Try cropping to the subject and removing distracting objects in an image editor before conversion. Cropping alone will not erase a shadow that touches the subject. If the goal is a clean silhouette or text on a plaque, create an image with a simpler background; if you can produce a transparent PNG, the PNG to STL tool is better suited to that outline. JPG does not contain a transparent background.
Should you turn the photo black and white first?
Not necessarily. The converter creates a black-and-white preview from your JPG, so you can see how light and dark areas will affect the model. Editing the source beforehand is useful when color differences, harsh lighting or unwanted texture lead to a poor grayscale result. Remember that a dark shadow in a picture is not proof that the photographed object is physically lower.
For transparent logos or artwork with hard edges, use PNG to STL. For other supported images, use Image to STL.
How to Check a JPG-Generated STL Before 3D Printing
The converter makes an STL file, not preconfigured printer instructions. Check the output in your actual slicer before starting a print.
- Import the STL. Open it in your slicer and select the correct printer profile and material.
- Confirm dimensions. Check the model's width, height and thickness; STL does not encode physical units.
- Orient it for the shape. A relief plaque may print flat, while a lithophane often needs testing in a more upright orientation for image quality and stability. Use supports or a brim only where needed.
- Check the layers. Slice the model and scroll through the layer preview. Look for disappearing thin areas, missing details, unplanned islands or unsupported edges.
- Print a small test. For a lithophane, use your intended material and lighting to judge contrast. For a relief, check whether the raised features are clearly visible.
Use the STL Viewer to check the downloaded model or the STL Editor to resize or rotate it. If the slicer flags an open or broken mesh, try STL Repair and verify the changes.
Your JPG is processed in your browser for conversion; check the downloaded STL locally in your slicer before printing.
Lithophane 3D Printing Settings: Orientation, Layers and Light
A lithophane reveals its picture when you shine light through areas of different thickness. These suggestions are starting points for a filament (FDM) 3D printer, not settings that work for every machine. Open the STL in Cura, PrusaSlicer or your usual slicer, and choose your printer and material.
| Setting | Practical starting point | Why it matters |
|---|---|---|
| Material | Try a white or pale PLA suited to backlighting. | Filaments vary in how much light they transmit; opaque or colored material changes contrast. |
| Layer height | Try 0.10 mm if your printer supports it. | Thinner layers may capture smoother changes in thickness, but take longer to print. |
| Inside the panel | Check that the panel prints solid, without a grid-like filling inside. | The filling pattern may show through when the photo is lit from behind. |
| Orientation | Test upright versus flat rather than assuming one works everywhere. | Upright may give better image detail but needs a stable narrow base; flat is usually easier to support. |
| Keeping the panel steady | For a tall upright print, consider a brim (an extra border around its base). | A wider base can help keep the panel attached to the print bed. |
| Light source | Use an even light behind a small test piece. | Uneven lighting can hide details even when your model looks right. |
Should you print a lithophane flat or vertically?
Upright: The panel stands on its thin edge. This may preserve fine image detail, but a tall, narrow panel can wobble or pull away from the print bed. Check its stability and consider a brim or support frame if needed.
Flat: The panel lies on the bed and is easier to support. Changes in the picture's thickness are built up one layer at a time, so a smaller layer height may help. Print time and surface finish vary by printer. A Prusa guide describes the flat method as a reliable choice when avoiding wobble.
What to check in Cura or PrusaSlicer before pressing Print
- Confirm the dimensions. Check the downloaded panel's width, height and, for the portrait example, its 0.8–3.2 mm thickness range. If you resize it, check that the panel does not become too thick or too thin.
- Check the inside of the sliced model. Look through the layer preview and make sure you cannot see a grid or other filling pattern inside the photo. Adjust the slicer settings so the panel prints solid.
- Inspect the first layer. Make sure an upright panel has enough contact with the print bed to stay steady.
- Check the resulting image with light. A small printed piece shows you how the photo looks with real light and material.
Manufacturer guidance offers useful starting points: UltiMaker's lithophane and Cura settings explain the importance of a solid slice, fine profiles and layer preview. Prusa's photo-to-3D guide discusses flat lithophane printing and its tradeoffs. Follow your current printer profile when these examples differ.
Make a Small Test Print Before Using the Full Photo
When an STL looks right in a viewer but prints poorly, it helps to compare small tests instead of changing five settings at once. This applies both to the landscape relief and the portrait lithophane.
- Choose one problem. For a relief, perhaps the landscape sky is too bumpy; for a lithophane, perhaps dark faces lose detail when backlit.
- Save your first version. Download an STL using the suggested settings, and note its mode, thickness, Contrast, Smoothing, Detail and size.
- Change one setting. Make a second version with only a modest Smoothing, Contrast or thickness change. Keep the crop and size unchanged while comparing.
- Use the same printer settings for both. Check the layers where you noticed the problem. See whether the fine details appear in the slicer preview.
- Print the smallest useful comparison. Use the same filament and lighting. For a portrait, choose a crop containing both light and dark detail so you can judge the full thickness range.
- Keep the better version. Once the specific problem improves, decide whether to print the full-sized piece or test the next setting.
Success looks different by mode: a relief should show clear raised details without unwanted bumps; a lithophane should show recognizable light and dark areas when lit from behind, without grid patterns or missing details. Check the test print rather than judging from the photo alone.
JPG to STL Troubleshooting: Common Problems and Fixes
| Problem | Likely cause | What to try |
|---|---|---|
| The relief has noisy bumps | JPEG blocks, grain or a busy background. | Try a cleaner photo, crop it, and increase Smoothing gradually. |
| The subject looks flattened | Low contrast or very shallow relief. | Increase contrast or relief height a little, then inspect the 3D preview. |
| Light and dark details look reversed | Invert is not right for the image and mode. | Try Invert and check the black-and-white preview before downloading. |
| The portrait is hard to see when backlit | Material opacity, thickness or light source. | Test a small panel and adjust thickness, contrast or lighting. |
| The STL is large or slow | Detail is set very high. | Start with Medium (192) rather than High or Ultra. |
| The slicer loses fine features | Details are thinner than the selected print setup can make. | Check the model size and whether the slicer shows the fine lines; make the model larger or simpler if needed. |
| The model imports at an unexpected size | Unit assumptions or incorrect dimensions. | Confirm millimeters and adjust scale in the slicer or STL Editor. |
| Grid lines appear when the photo is backlit | The slicer has added a grid-like filling inside the panel. | Set the panel to print solid and check the layer preview before printing. |
| An upright panel wobbles or detaches | A narrow contact area or insufficient bed adhesion. | Check the first layer, consider a brim, or try a more stable orientation. |
| The JPG has a clean outline but the STL includes its background | JPG does not store transparency. | Remove the background and try a transparent PNG to STL conversion. |
If your STL has holes or surfaces that do not connect properly, read How to Fix a Non-Watertight STL File. A visual preview alone does not guarantee printability.
Frequently Asked Questions About Converting JPG to STL
Can I convert a JPG or JPEG to STL for free?
Yes. STL Toolkit converts JPG and JPEG files into reliefs or lithophanes in your browser. You can preview the shape and download an STL without an account. Both file extensions refer to the same image format.
Does converting a JPG to STL create a full 3D model?
No. A single photo does not contain the hidden back, sides or actual depth of the subject. This method creates a raised picture or a backlit photo panel, not a complete 3D model with all sides.
What is the best JPG-to-STL setting for a portrait?
Start with Flat Lithophane, minimum thickness 0.8 mm, maximum thickness 3.2 mm, contrast +20, smoothing 1, Invert on and Medium detail (192). These are starting points; check the result with your material, lighting and slicer.
What is the best JPG-to-STL setting for a landscape?
Start with Photo Relief, base 2 mm, relief height 4 mm, contrast +15, smoothing 2 and Medium detail (192). Check for unwanted raised texture in sky or shadow areas and adjust to suit the photo.
Can I turn JPG line art or a logo into STL?
Yes, a simple high-contrast JPG can produce a raised relief. For a logo with a transparent background and clean edges, PNG to STL is usually a better option because JPG does not preserve transparency.
Why does my STL look bumpy or pixelated?
Blocky patches from a heavily compressed JPG, blur, grain and busy backgrounds can turn into unwanted bumps. Use a sharper source photo, crop it, and raise Smoothing gradually. Increasing Detail cannot recover information missing from the original photo.
Can I 3D print the STL immediately after converting?
Open it in your slicer first. Check the size, thickness, print direction and each layer in your slicer. A model that looks correct on screen may still be too thin or awkwardly oriented for your printer.
What size should I make a JPG relief or lithophane?
Start with a size that fits your printer and still leaves important features wide enough to print. The converter uses millimeters and can keep the photo's original proportions. For example, a 4:3 photo set to 120 mm wide would be 90 mm tall. Verify the actual dimensions in your slicer.
Should I print a lithophane flat or upright?
Both are possible. Upright printing can improve horizontal detail but needs good bed adhesion and may wobble. Flat printing is more stable but the image detail depends more on the chosen layer height. Compare the sliced layers and test the option that works with your printer.
What infill and layer height should I use for a lithophane?
Try a fine layer height, such as 0.10 mm if your printer supports it, and check that the panel is solid without a visible grid pattern inside. Material and model orientation can change the best settings, so inspect the layer preview and test before printing a full-size image.
Can JPG-to-STL make a figurine or full 3D scan?
No. Relief and lithophane modes create a surface or thin panel from image brightness. For a full 3D object, use 3D modeling software or an appropriate 3D scanning method. One JPG cannot show the hidden sides or back of the object.
Is my uploaded JPG kept private?
STL Toolkit processes the image locally in your browser for this conversion. The original photo is not uploaded to STL Toolkit servers to generate the model.